Now that Apple have released OS X 10.8 Mountain Lion to the world, there are a lot of happy campers out there who are enjoying the latest and most advanced operating system from the Cupertino based company. The download and installation of Mountain Lion for Mac users couldn’t be any simpler with it being available as a digital download via the Mac App Store and it being installed with just a matter of a few clicks over the top of an existing 10.7 or 10.6.8 installation.
But what about those users who want to enjoy the benefits that this latest operating system brings and run the latest OS X on a Windows based PC? Once upon a time this process, known as a Hackintosh, was quite a lengthy process that threw up a few hurdles along the way. Those days are a thing of the past thanks to the UniBeast method of creating a bootable USB drive and thanks to a recent update this is now possible using OS X Mountain Lion. Read on for the step by step guide.

Requirements:
- Access to a Mac to download OS X Mountain Lion from App Store and prepare UniBeast USB Drive.
- A minimum of 8GB or larger USB flash drive.
- A PC capable of running OS X Mountain Lion.
Step 1: First and foremost, this process requires that you own a copy of Mac OS X Mountain Lion (10.8) and a USB drive with a minimum capacity of 8GB. The operating system is available to download from the Mac App Store for $19.99. If you haven’t already, download OS X Mountain Lion using your registered Apple ID.
Step 2: Download the updated and current version of UniBeast that is available from thedownloads section of the tonymacx86 website (free of charge registration required).
Step 3: After the relevant software has been downloaded, the initial step is to create a bootable USB drive containing OS X Mountain Lion. With the formatted USB plugged into an available USB port on your Mac, open up an instance of Finder and navigate to/Applications/Utilities/Disk Utility and highlight the relevant USB drive in the left hand column of the interface.

Step 4: Select the Current drop down menu and choose the 1 Partition option.
Step 5: Select Options underneath Partition Layout menu and make sure the Master Boot Recordoption is checked. Click Ok.

Step 6: On the right hand side of the Disk Utility window there are options to name the USB Drive. You can choose a name now or it can be done later. Under the Format header, make sure Mac OS Extended (Journaled) is selected. Select Apply before selecting Partition.

Step 7: Run the UniBeast 1.5.1 application that was downloaded in step 2. If UniBeast is giving you an error message relating to Mountain Lion being missing, make sure the installation file downloaded from the Mac App Store is located in the /Applications folder.
Step 8: When UniBeast is running, skip through the first few screens before selecting the relevant USB drive on the Select a Destination screen. Choose Continue, then enter your system password for approval. UniBeast will then look for the Mountain Lion installer file in the/Applications folder and install it to the USB drive.

Once the process has ran its course and completed, the partitioned USB drive will have a functional version of OS X Mountain Lion on it that can then be used on a PC to create an installation of Mountain Lion. The next few steps can be followed through to ensure everything is working without issue.
Step 9: Insert the USB drive into the PC that you want to turn into a Hackintosh and make sure that the machine is set to boot from USB through the BIOS.
Note: Steps 10 – 12 are only required for new installations. If you are updating from an existing installation of Mac OS X Snow Leopard or OS X Lion these steps can be skipped.
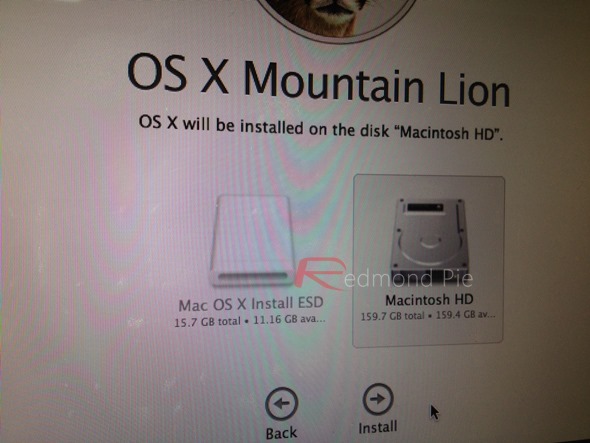
Step 10: After booting from the drive, you should now be in the OS X installer. Set the desired language, choose the Utilities option from the menu bar before selecting Disk Utility. Select the target hard drive for the installation of Mountain Lion on your PC and click the Partition tab.
Step 11: Once again, select the Current drop down, select 1 Partition before selecting Optionsand choosing GUID Partition Table.
Step 12: Type in Macintosh HD as the name of the partition and once again set the Format toMac OS Extended (Journaled).
Step 13: Click Apply then Partition before closing down the Disk Utility.
Step 14: Now simply install Mountain Lion on this hard drive.
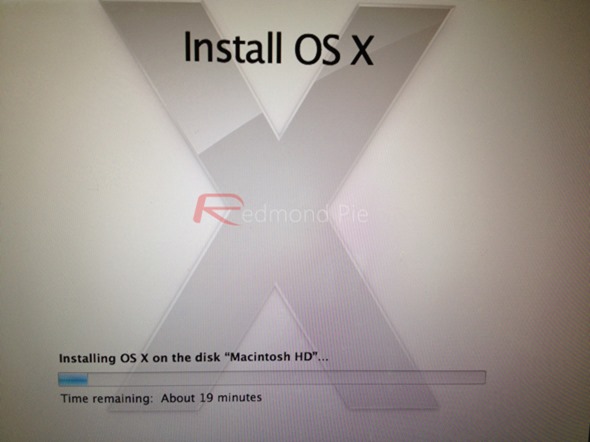
When the process is completed, restart the machine. When the machine boots up, choose the new Mountain Lion option to make the drive bootable.

So there we have it, a fully functional Hackintosh PC running the latest Mac operating system. Last but not the least, you will need to install the drivers for your machine. This can be done using MultiBeast tool, which can again be found in the downloads section over at tonymacx86.
Apple will obviously tell you that the Mac machines they produce are designed to work harmoniously with the software and operating systems that they also develop, but running OS X on a Windows based PC can be an extremely pleasurable experience now that the installation process is relatively pain free.
You may also like to check out:
- How To Install OS X Mountain Lion v10.8 On Your Mac [Upgrade Only]
- How To Do A Clean Install Of OS X Mountain Lion 10.8 On Your Mac
How to fix a phone dropped in the toilet (infographic)
") Ten per cent of smartphone owners have acquainted their handsets with a
watery grave by dropping them in a toilet. In an effort to prevent and
lessen the impact of such toilet tragedies, a cheeky and informative
infographic provide tips on how to resuscitate a water-logged
smartphone.
Ten per cent of smartphone owners have acquainted their handsets with a
watery grave by dropping them in a toilet. In an effort to prevent and
lessen the impact of such toilet tragedies, a cheeky and informative
infographic provide tips on how to resuscitate a water-logged
smartphone. For example, act quickly to fish the phone out of the toilet to prevent water from further infiltrating the phone, and invest in a waterproof case.
The infographic even highlights some water-resistant phones that are on the market today.
Smartphone in water image via Shutterstock

How To Gift Apps From iOS 6 App Store Using iPhone, iPad, iPod touch

Step 1: Open up the App Store on the relevant iOS device and tap on the Search tab on the bottom tab bar. Search for the app you wish to gift in the search field and click ‘Search‘.

Step 2: Select the app from the returned search results before selecting the Action button in the top right hand corner.

Step 3: from the resulting action sheet, select the Gift option from the bottom row of available icons.

Step 4: Fill in all of the required details of the person that you are gifting the app to before selecting Next from the top right hand corner.

Step 5: Select a theme from the resulting display that will be used to make the gift look all pretty and presentable.

Step 6: Confirm the purchase and the sending of the gift before selecting Done to complete the process.

After the process has been completed, the recipient will receive an email with all of the necessary details enabling them to complete the gift transaction and download the gifted app from the App Store. Although the process was briefly removed from iOS 6, it is nice to see Apple getting themselves in gear to ensure that we can all enjoy giving mobile apps to our loved ones.
How To Block / Unblock Calls On iPhone Based On Location
By Goncalo Ribeiro | December 27th, 2012
We have all been there: relaxing at home, perhaps about to
complete a level of your favorite videogame, when your manager rings you
up asking for a report that was due the day before. Instead of
interrupting the game, or take the call and give a half-apology,
wouldn’t it be great if certain places were off-limits for calls by
selected groups of people? Call Bliss is an app for iOS 6 that makes
this a reality.Earlier this year, Apple launched iOS 6, which introduced “Do not disturb” mode, allowing users to automatically ignore any received calls, or any sort of notification for that matter. This addition has received great fanfare, yet many expected it to be slightly more selective than a simple on/off switch.

Call Bliss bridges this gap in an intelligent way and setting it up is indeed a bliss: from within the app, you will need to create a list of places, such as “Work”, “Gym”, “Home” or “School”, and groups of people, such as “Friends” and “Co-workers”. From there, simply assign your different contacts to one of these groups, and then at which places you wish to be reachable by each group. Allowing your co-workers to call you at work would probably be required, but not the friends you play basketball with.

Once these settings are set, Call Bliss works as you would expect: by detecting your location automatically and on the fly, you will only receive calls from the contacts you really want to hear from – everybody else will just be automatically ignored and sent to voicemail. Should you ever be in the mood to block all calls, or feeling extra-social and in the mood to give your boss an extra chance by allowing him to call you in the middle of your Sunday family trip, Call Bliss is equipped with two special modes, “Allow all Calls” and “Block all Calls”.

This app is definitely a great addition for somebody wanting to better manage their contacts. Keep in mind, however, that since it’s programmed to detect your current location on the fly, wherever you are, it might be somewhat of a drain on your battery life.

Call Bliss is available from the iOS App Store for $2.99.
(Source: Call Bliss For iPhone on App Store)
How To Password Protect iPhone Photos Or Any Other App
By Ben Reid | April 5th, 2013
Natively, iOS allows you to set a passcode (or indeed, an
alphanumeric password) to protect your device from prying eyes, which is
great, of course, when it works. However, it’s a bit of an
inconvenience to continue unlocking a device and typing in those digits
if, in actual fact, we only really want to lock one or two apps down.
Recognizing that people don’t tend to take advantage of iOS’s security
features to safeguard their Angry Birds score, one developer has come
through with a great jailbreak tweak that allows you to securely protect
your device’s photos with a password.
Sure, the tweak – named Protect Photos – is certainly not
the first of its kind. But when we’re talking about the security of our
devices and in this case, our images and photos, it’s worth making a bit
of additional noise for a utility that covers all bases. Protect Photo
goes above and beyond the call of duty, not only allowing you to protect
the Photos app, but also the Camera app, and you can protect photos
accessible from within other apps by using this free tweak.
In actual fact, you can protect any app by using Protect Photos, and having tested it out personally on my iPhone, I can confirm that it works as advertised. The fact that, rather than being a Photo protecting app, it’s more of an everything protect app, is just a bonus, and with an extremely easy-to-navigate user interface, keeping your apps locked down needn’t be a stressful process.

Protect Photos is available over at the BigBoss repository, which will be among the default repos in your source list in Cydia from when you initially applied the jailbreak to your device. As mentioned before, it is absolutely free of charge, and although the likes of Lockdown Pro, PhotoAlbums+ and DisableLaunch are seasoned veterans in this particular category, this one will allow you to keep your change in your pocket for something else.

How To Launch The Camera App On iPhone From Within Any Running Application
By Paul Morris
The built-in camera is probably one of the most widely used
aspects of any of Apple’s fantastic iOS devices. Gone are the days of
consumers using a mobile telephone purely for phone calls and text
messages, meaning that the iPhone and iPod touch are now used daily by
most owners for a wide variety of activities including snapping
photographs wherever they are. The introduction of the camera grabber
option on the lock screen has meant that we now have quick access to the
camera to ensure we don’t miss that perfect shot, but the InstantCamera tweak from Cydia also has a place on a jailbroken devices for photography fans.
InstantCamera is one of the latest packages to land on the Cydia
store and offers pretty much the exact functionality that the name of
the tweak suggests. Installing the package will allow users to have
almost instant access to the Camera app from anywhere on the system.
This negates the need to exit the currently running application or enter
the multitasking switcher tray to invoke the native Camera app to
capture an image.The developer of the tweak achieves this level of camera access by hooking into the fantastic Activator library by Ryan Petrich and allowing users the ability to set a custom gesture for the feature to be invoked. Although no additional icons are installed on the device, users can head on over to the Settings.app and choose the custom gesture that they would like to use to open the Camera app. It is then a simple case of using that gesture from within any running application to capture the perfect image.
One of the extremely useful aspects of InstantCamera is that it actually remembers the current state of the device before the Camera app is launched. This means that if a user is in the middle of browsing the Redmond Pie website through Mobile Safari and then decided to invoke the camera using InstantCamera, when the picture is taken, the user would be returned straight back to Safari to carry on. Not exactly mind blowing functionality but extremely important from a user experience perspective.

InstantCamera is available for $1.00 on the BigBoss repository and requires a jailbroken iPhone or iPod touch running iOS 6 or higher.
3Doodler Pen allows you to draw in 3 Dimensions
New 3Doodler Pen allows you to draw in 3 Dimensions - much like the way that 3D printers work - only difference - The Price will be around $75!It's a pen that can draw in the air! 3Doodler is the 3D printing pen you can hold in your hand. Lift your imagination off the page!
more:http://www.kickstarter.com/projects/1351910088/3doodler-the-worlds-first-3d-printing-pen
Photo credit: Reddit/PhotoDojo

How To Free Up Space On iPhone, iPad By Removing Caches, Temporary And Junk Files Without Jailbreaking
By Ben Reid | August 19th, 2012
If you own an iPhone, iPad or iPod touch device, you’ll be more
than aware that storage space can often be at a premium. Apple makes up
to $100 per size upgrade on the iDevice range, which means many opt for
the model with the least space in order to save those precious few
dollars. While many manage just fine with 8 or 16GB of real-estate for
music, videos, ringtones and whatnot, it often becomes a bit of a
squeeze, and quite a few end up having to delete files just to get by.
The thing is, when you check your Settings app and realize you’re
down to megabytes as opposed to gigabytes, it’s not just the obvious –
your third-party apps, music, video clips and games that are taking up
all the space on your system. Files you thought were deleted, caches,
offline files, cookies and temporary files could be clogging up your
system, and PhoneClean is a utility created to combat this problem.
If you find yourself shocked by the storage space (or lack thereof) you have on your iOS device, PhoneClean will try and restore some order for you. It’s a windows-only application (surprising, given it’s aimed at Apple products, but I digress), and it costs absolutely nothing.
Compatible with Windows XP or newer, it’s only 3.5 MB in size, and once you give it a whirl, its creators promise “your iPhone will run faster and more smoothly.” By removing a bunch of unnecessary files, PhoneClean frees up memory resources, saving them for when you’re looking to launch apps, surf, and play those explosive App Store titles.
As a side note, if you’re jailbroken, you might also like to try iCleaner, a tweak / app which allows you to pick and choose from numerous aspects of your device and clean them up, freeing up space in the process.
Please note, if you do use PhoneClean for your cleaning up needs, you
may lose certain features you’ve become reliant on. For example, if you
use your device for browsing, and want to maintain your saved searches,
cookies etc., then please bear this in mind before running PhoneClean.
PhoneClean for Windows can be downloaded from here.
You can follow us on Twitter, add us to your circle on Google+ or like our Facebook page to keep yourself updated on all the latest from Microsoft, Google, Apple and the Web.PhoneClean for Windows can be downloaded from here.
How To Install Android 4.2.2 On Galaxy S3 GT-i9300 (CM 10.1) [How-To Tutorial]
By Ben Reid
Cyanogen Mod 10.1 nightly builds based upon the very
latest Android 4.2.2 Jelly Bean can now be installed on your Galaxy S
III (GT-i9300). If you own this particular model, and wish to check out
the latest nightlies, please check out our step-by-step tutorial after
the break.
One of Android’s biggest assets is its ability to be modified
extensively, and with CyanogenMod being one of the most popular
aftermarket firmware ROMs around, many dev-orientated folks like to
check out the nightly builds released in between main versions. If you
just so happen to be one of those individuals, please check out the
detailed tutorial below.
DISCLAIMER: Before we get started, please note that Redmond Pie will not be held responsible for issues that may aries with your device as a result of following this tutorial. Proceed at your own risk.
Additionally, since these nightly builds seldom run perfectly, we only advise installing on a spare Galaxy S III, as opposed to your daily driver. Again, we’ve warned you, this ROM might not serve as your daily driver, let’s begin!
Step 1: First off, you will need to root your Galaxy S III, and then flash ClockworkMod Recovery to it.
Step 2: Download the latest nightly of CM10.1 from the CM Downloads page, as well as GApps for CM10.1, which you can grab by doing a simple search on your favorite search engine. Once downloaded, drop them into the both into the /sdcard directory of your handset.
Step 3: Next, you will need to shut down your Galaxy S III before booting into ClockworkMod Recovery. If you’re unsure of how to do this, you just need to remember to hold Volume Up + Home + Power simultaneously.
Step 4: Take a Nandroid backup.
Step 5: Next, you’ll want to navigate to install zip from sdcard > choose zip from sdcard and then select your CM101.zip file. It’s best to rename the CM 10.1 zip you downloaded in Step 2 to CM101.zip so that you can locate it easily.
Step 6: Apply the same process as in step 5, but for GApps.
Step 7: From within the ClockworkMod main menu, select wipe data / factory reset, and once the process is complete, opt to reboot system now from the main menu.
")
Provided everything has gone as it should, your device will boot into the nightly build of CyanogenMod 10.1 (based on Android 4.2.2) you downloaded earlier on.
You can follow us on Twitter, add us to your circle on Google+ or like our Facebook page to keep yourself updated on all the latest from Microsoft, Google, Apple and the web.
Here's how you can transfer iPhone stuff to Android smoothly.
 (Credit:
Jason Cipriani/CNET)
(Credit:
Jason Cipriani/CNET)
But before you make the change, there are some kinks that need to be worked out to make the process go as smoothly as possible. You likely have contacts, a calendar, photos, and music that you'll want to bring over to your new Android device. Some of these are going to be pretty easy to get transferred, while others are going to take some work. So sit down in front of your computer, preferably with both devices, and let's get started.
Before you begin setting up your Android device, you're going to need a Google account, be it a Google Apps or Gmail account. It's not required on an Android device, but if you're going to take advantage of all that Android has to offer, you'll want to sign up for one. You'll be asked to log in to this account during the initial setup process on your Android device. If you skipped this step and want to go back and add the account later, you can go to Settings > Accounts > Add Account > Google. This same process can be followed to add another type of account (Yahoo, Hotmail, etc.).
Contacts, Calendar and Mail
If your contacts are syncing from your iPhone to Gmail, transferring them will be a breeze. Just make sure you sign into your Android device using the same account you use on your iPhone and make sure Contact sync is enabled. For other accounts, such as Yahoo, you'll need to export your contact list from the Web site for the account. You can typically find this in settings for your account. Or, some carriers offer a free app in the App Store built specifically for transferring your contacts. Verizon and AT&T have apps that do just that. Should you be an iCloud user, you can still use your iCloud account to sync calendars and contacts to your Android device, but you're going to have to purchase a couple of apps. I have talked about one of the apps before, called SmoothSync for Cloud Contacts; the calendar app is called SmoothSync for Cloud Calendar. These two apps will add your iCloud account to your Android device, allowing you to keep your iPad or Mac in sync with your Android device. This comes in especially useful if you're sharing an iCloud calendar with a family member and don't want to force him or her to switch to Google Calendar just because you've switched to Android.Music
Perhaps one of the quickest steps of moving from an iPhone to Android is getting your music collection on your new device. What you'll need to do is download the Google Music app to your computer and point it at your music collection. Google will then store your music in the cloud, up to 20,000 songs for free, and let you stream it on your shiny new Android device via the Music app. Anytime you add new music to your catalog, the Music Manager app will automatically upload and sync it to your Android device for you. If using Google Music isn't possible for you, you can drag-and-drop the music on your computer into the Music folder (create one if it's not present) on your Android device via a USB connection. Mac users will have to use the Android File Transfer app to access their device's storage.Photos
With the introduction of iCloud and its Photo Stream service, getting photos off your iOS device is easy. Using iPhoto on a Mac, or installing the iCloud Control Panel on a Windows machine you can conveniently grab photos from your iPhone and then sync them to your Android device via USB or through your Google+ account. For videos on your iPhone, you'll need to use iTunes, iPhoto, or a file explorer to grab the files. Using a program like iExplorer, Image Capture (found in the Utilities folder on a Mac), or the native Windows File Explorer taking the files off your device is simple.Going forward, you can sync photos from your Android device to your computer via USB, or by installing the Dropbox app and enabling its Camera Upload feature. Rather not mess with a file explorer? The Dropbox Camera Upload feature is another method to get photos off of your iPhone and on to your computer.
Customizing
One of the biggest changes you'll experience when switching over from an iPhone to an Android device is the ability to customize your device. The options for changing different aspects of your Android device are nearly endless. While it's hard to cover all of the different ways to customize your device, this post covers 12 of the more popular methods. From assigning ringtones to contacts, editing contact photos, to adding custom ringtones and wallpaper, you'll find apps and guides to help with the transition from iOS to Android.How To Protect Android Phones And Tablets From Growing Malware Threat [Guide]
By Aatif | April 25th, 2013
Ever since the start of modern computers, malware has been an
omnipresent issue. Viruses, Trojans, rootkits, spyware, keyloggers and
several others of the like continue to assault your computing devices
all the time, looking for vulnerabilities and loopholes in your defenses
to get through. Generally, users have become aware enough to deploy
some form of protection on their desktops and notebooks, and while
infections continue to plague the computing world, they’re significantly
reduced in impact.
Smartphones today are nothing short of portable computers as well,
and just like that, are prone to malware attacks. Hard as it may seem to
believe, developers do spend time creating smartphone malware that
would let them access your personal information, exploit personal data
and otherwise do damage to your device. Android is a fast growing mobile
platform with apps exceeding 600,000 in the Google Play Store, and
believe me when I tell you that an assessment puts over 100,000 of them
as “questionable”. While most users don’t pay much attention to it, it’s
imperative that you secure your Android smartphone or tablet against
the growing threat of mobile malware. They say prevention is better than
cure, and in this post, we’ll provide some basic pointers on how to
achieve that.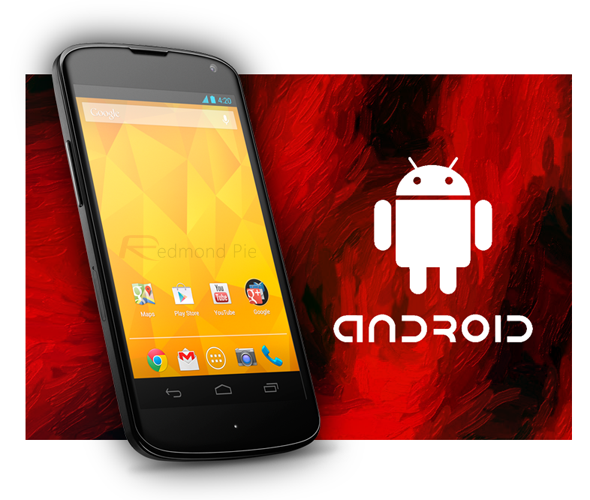
- When downloading apps, prefer the well-reputed channels, mainly Google Play Store and the Amazon Appstore. Google implements a rudimentary “bouncer” to ward off malware, and the rest is taken care of by the very-active Android user community. Hence, these two sources are your most reliable ones.

- Unless you’re a power user, it’s highly advisable to keep installation of apps from Unknown Sources at “off” in the device’s settings. This will help ensure that nothing enters the system except through official channels.

- Read app reviews and see ratings before you choose to download anything. If it’s something from a renowned developer, you’re less likely to run into trouble as opposed to an app with hardly any downloads and just 2-3 reviews. As a rule of thumb, I don’t prefer apps with a rating of less than at least 3 stars.

- Carefully examine the permissions that an app is asking for, and use your own judgment to decide whether you want that app or not. A puzzle game asking to access your contacts and phone app is never really a good idea, and neither is a torch app seeking internet permission. Discard apps that seem shady – they’re usually not worth risking personal information over.

- Never access links embedded in mass-broadcast messages/emails on your phone. You never know what’s hidden underneath a URL, and it’s harder to check that on a smartphone as opposed to a traditional computer. Phishing scams thrive under unrestricted access through your web browser.
- If you have a rooted phone, be extra cautious about granting superuser access to any app. Make sure you understand the purpose of the SU access, and trust the developer enough to grant it. This is the highest level of access that anyone (or anything) can have on your Android device, so be really careful with this one.

- Avoid, under all circumstances, pirated apps that you obtain through illegitimate sources. Not only is it wrong ethically, it also poses the biggest threat, in that you never know how the pirated APK has been modified. and what the consequences of installing such an app could be. Saving $0.99 isn’t worth it, really.
- While not strictly a malware protection measure, it’s still a good idea to keep your phone locked for security. Someone else gaining access to your device might be able to install undesired software before you reclaim access, and hence, causing you to remain unaware of the whole deal until it’s too late. Likewise, a remote wipe app should also be there, should you ever encounter a scenario where normal access to the device gets blocked by the malware infection.

- Have some good Android security apps installed. A lot of capable contenders are available in the Google Play Store for that purpose, with more notable ones being Avast! Free Mobile Security, Lookout Mobile Security and Norton Mobile Security, just to name a few. There is a different feature-set offered by each, so you have room to weigh your options carefully before making a decision to go with one. If you’re still wondering if you really need such apps, we’ve covered them in detail in a separate post before. We’ve also covered the top antivirus apps for Android, you might want to check that out as well.

While this guide is neither exhaustive nor definitive, following these steps will help you ensure that your device remains secure, safe from malware, and most importantly, exclusively yours.